

Managing Workflows as Your Bubble.io No Code App Grows Can Be Challenging
Keeping Workflows organized in your Bubble.io no code web app can be a challenge. As your Bubble app gets larger and more complex you will be creating lots of Workflows. And all of those Workflows on the same tab can feel overwhelming and unmanageable to look at.
Fortunately there’s a couple of ways to help you better organize your Workflows. And they’re both easy to implement once you know how.
Tip #1 – Add a Splash of Color to Your Bubble.io Workflows
The first way you can organize your Workflows is by color-coding them. But before you color code your Workflows you need to figure out which Workflows “belong together” or are part of the same feature or function.
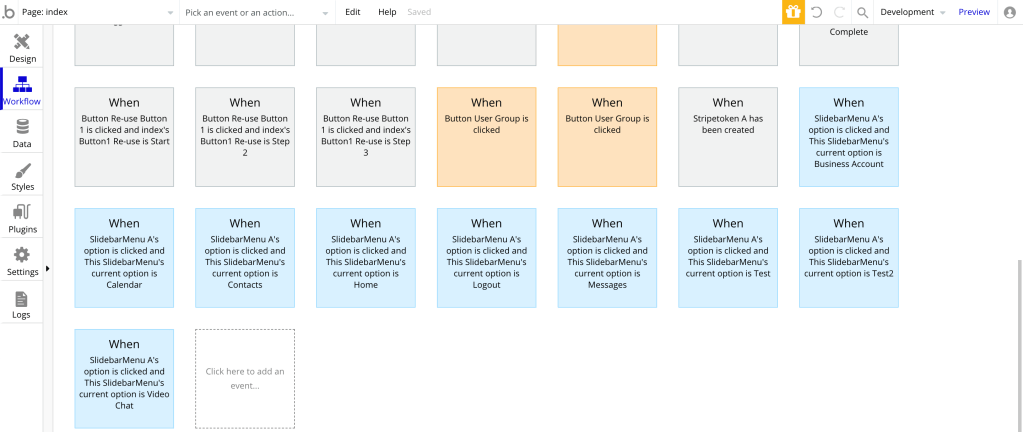
In the image below you see 9 Workflows colored blue. All 9 of these Workflows are associated to a SlidebarMenu Element in the app. So when you look at the Workflow page you can quickly tell which Workflows are used by the SlidebarMenu Element.
To change the color of a Workflow, simply click on the Workflow and you’ll get a popup similar to what you see below. Then click on the “Event color” dropdown menu. The default value is “Gray”. In this example “Blue” was selected. That’s all there is in selecting a Workflow color.

Tip #2 – Move Your Bubble.io Workflows into Folders
The second way to organize your Bubble.io Workflows is by moving them into Folders. Similar to color-coding your Workflows, you need to first identify which Workflows belong together in a Folder.
The first step in creating a Folder is to display the Workflow folders. In the image below you see an arrow circled in red. Bubble’s default is to hide the Workflow folders so you’ll need to click the arrow at which point you should see something similar to below with the “Workflow folders” header shown.

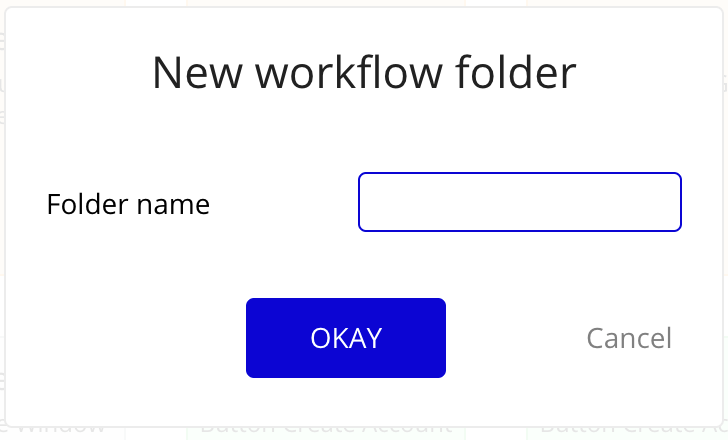
You will also see the “Add new folder” button. Simply click on that and you’ll get a popup asking you to enter a “Folder name” as shown below. Type in whatever you want your Folder to be called. In this example the folder name “Menu” was entered before pressing the “OKAY” button.
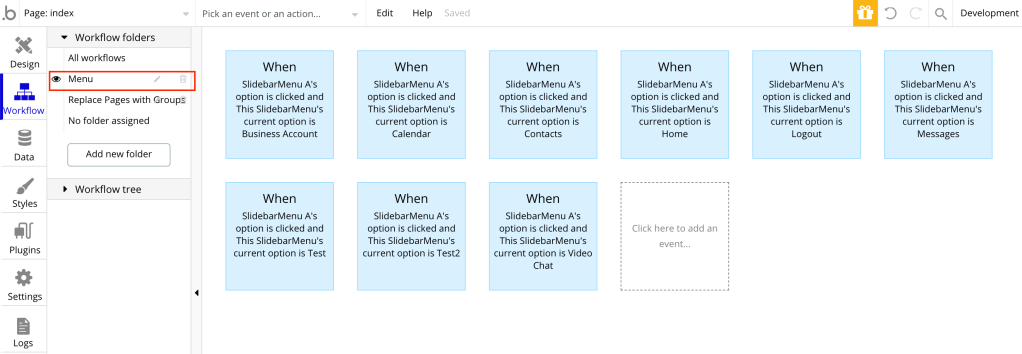
In the image below you see a Workflow Folder called “Menu” which has all 9 of the SlidebarMenu Element Workflows discussed earlier.
To add a Workflow to a Workflow Folder, refer to image below where you see the Workflow popup showing the “Workflow folder” dropdown option. And you see “Menu” as an option. Simply select the option “Menu” and the Workflow will now be in the Workflow Folder called “Menu”.
Also note the second way in which to create a Workflow Folder (above you saw how using “Add new folder” button). In the image below you also see the “Create a new folder…” option in the dropdown menu choices. Clicking that will open the “New workflow folder” popup discussed above.

New Tools in Your Bubble.io No Code Web App Toolbox
You now have a couple of new tools to organize your Workflows which will help improve your Bubble.io no code web app development experience.
I have found color-coding Workflows to also be helpful for not only organizing my Workflows but also as an aid in trouble-shooting my apps. For instance, if I have a Workflow that isn’t behaving as I expect I’ll make the Workflow color red. Then as I switch between the Bubble “Design”, “Workflow” and “Data” tabs to troubleshoot I can quickly find the red Workflow in the mix of all the gray Workflows.
For more details check out the video below and please subscribe. Thanks in advance!


