

So you have a no code web app you created using Bubble and have been getting some user uptake by spending money on Facebook, Google, Twitter, etc ads. You’ve also heard about affiliate marketing and think this may be great “performance based” approach to cost effectively get new users.
If you’re not familiar with affiliate marketing, it’s basically a way in which you get other people (“affiliates”) to sell your product; your app in this case. The affiliate only gets paid when a user signs up and pays for your app.
Now this all sounds good, but you’re not sure how to set up your app to enable affiliates to start selling your app. In the following video you’ll learn exactly how to set up an affiliate program in your app.
The first thing you’ll need to do is set up a “landing” page in your app so affiliates can go to it and create an affiliate account. Now you could go and do this on your “Index” page, but I recommend you create an “Affiliate” page because you’re going to want to put affiliate specific information on your “Affiliate” page. Putting affiliate information on your “Index” page can make for a poor user experience because your “non-affiliate” users aren’t interested in affiliate information. It’s “noise” to them and can clutter (and confuse) non affiliate users.
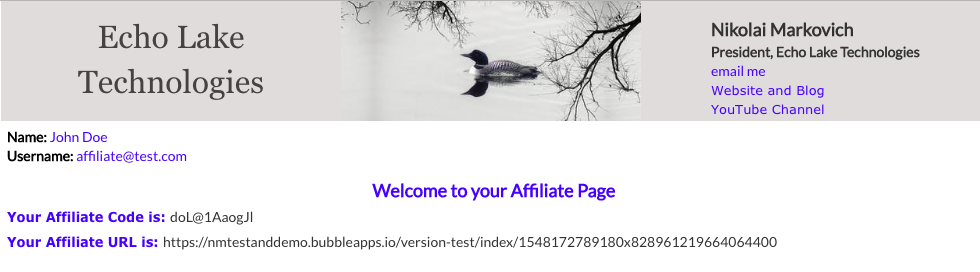
On your “Affiliate” page you’ll need two basic things. First is the ability for the affiliate to create an affiliate account. The second is showing the unique URL and affiliate code that the affiliate (and you) will use to track the users who sign up using the affiliate’s unique URL. Below is an image of the “Affiliate” page from the demo. You can see the affiliate’s name, the “Affiliate Code” and the “Affiliate URL”
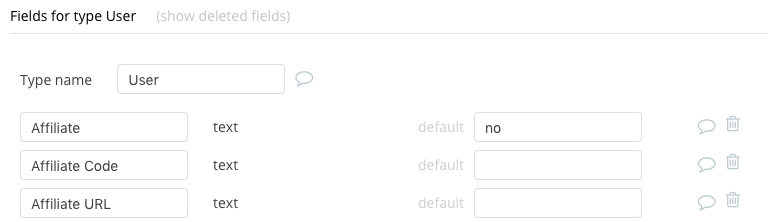
From a database perspective, you will need to add three Data Fields (all of type “text”) to “User”:
- “Affiliate” to track whether a “User” is an “Affiliate” or a regular “User” in your app
- “Affiliate Code” which will be the “Affiliate’s” unique reference code
- “Affiliate URL” which will be the unique URL the affiliates will share with their audiences
The image below shows the three fields for “User” in the Bubble database.
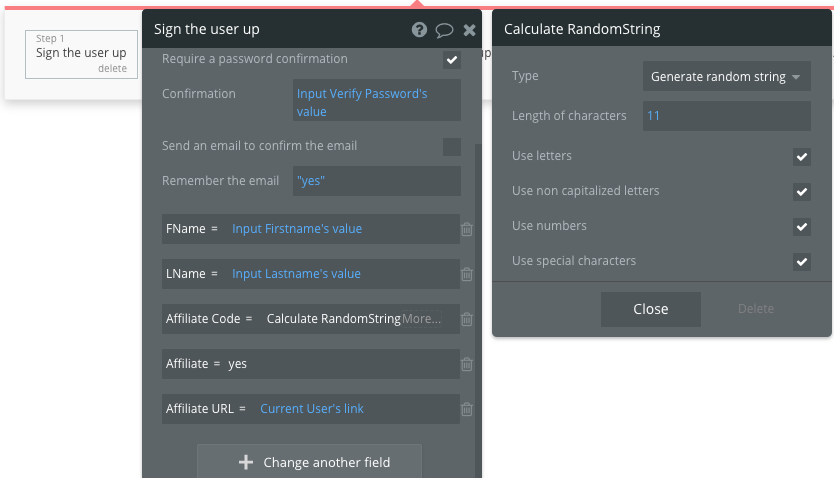
To create the “Affiliate Code” you will need to add the Free “Random Number Generator” plugin (see image below). Note: You could create the “Affiliate Code” many other ways, ie the affiliate’s email concatenated with their first name or simply use their email. The random number generator was used to help prevent any fraudulent activity.

For the “Sign a user up” Workflow Step, the “Affiliate Code” value will have a popup which is shown on the right in the image below. You’ll need to select the length of the “Affiliate Code” and the types of characters.
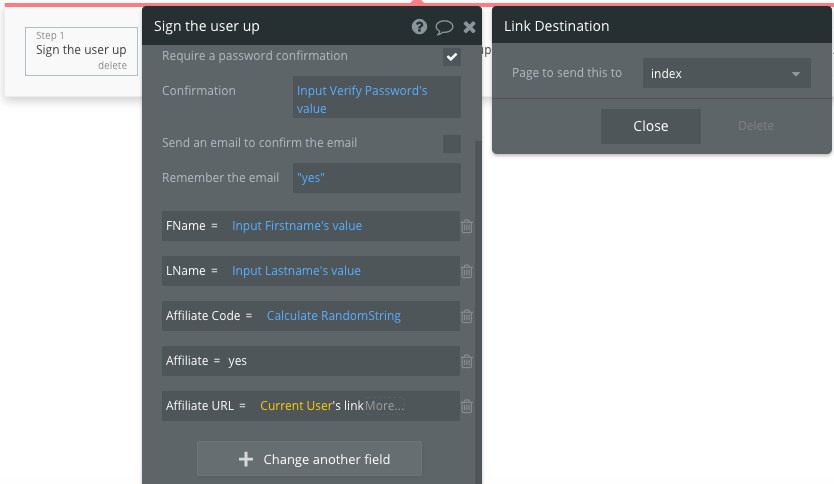
To setup the “Affiliate URL”, you will also get a popup (shown on right side of image below) to pick what page the URL will bring a user too. While you have choices, I selected “index” because I want all users, whether they came from an affiliate or not, to go to the “index” page so I only have one login design for all of my app’s users.
On the Index page you’ll have a “Do when condition is true” Workflow. In the image below you see the “Only when” condition which is determining if the “Current Page User” is an “Affiliate” or not.
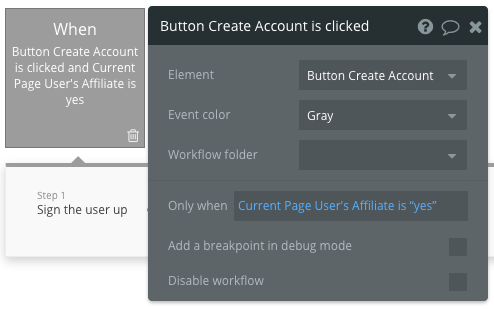
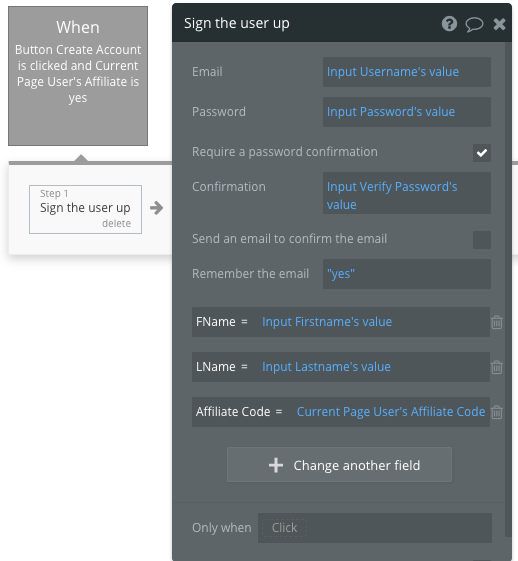
If the “Current Page User” is an “Affiliate”, then the “Sign the user up” Workflow Step looks the image below. Note the user signing up does not need to enter an affiliate’s unique code. You simply take the “Current Page Users Affiliate Code” and assign it to the the user creating the account.
The video goes into much greater “step by step” detail for setting up your app’s “Affiliate” page as well as the login for users. Check it out!


